Hello folks. Since the nature of the MediaWiki script (as is used on wikipedia) can be a little daunting for those who have never used it, I decided a tutorial would be in order. My advice would be to read this tutorial, then look at the edit tab of an existing entry to see how it all comes together, then make your own entry. Remember, anything can be edited and fixed by yourself or anyone else. Have fun, experiment, and discuss any problems you have.
Step 1. - Creating A New PageMethod A. Click A Red Link
 There are two main ways set up on Alphanex to create a new entry. The first option is to click one of the red links in an existing entry. Red links lead to entries that do not yet exist. When a red link is clicked on, it will automatically open the editing screen for the subject named in the red link.
You will notice that the text box is totally empty. You will need to insert some Copy and Paste "code" from one of the templates, in order to create the desired layout. Open the Templates link in a new browser tab (on left hand column under Toolbox) I find that once you start editing, it is much easier to have your edit screen in one browser tab, and any other page opened in separate tabs. Click on the template that describes your entry (for this tutorial we will use the Hero Template. Notice the dotted box on the right hand side. The contents of this box is you copy/paste info for the template. Highlight the contents of the box, right click on it and choose copy. Return to the editor tab, right click in the text box and paste.Method B. Use Create Entry Link
Click on the Create Entry link under Toolbox on the Left Hand column. Here you will see several labeled text boxes, one for each Template. Enter the name of the Entry you want to create in the applicable text box, and click the "Create Page" button. This launches the edit screen with the template information already pasted in (neat huh?)
Step 2. - Inserting An Image
 At The first field to fill in on each template is "image="
To add an image in, it must first exist on your computer hard drive. From the Toolbox (left column) open the Upload File link in a new browser tab. Brows to the location of the image, click the Upload file button. When the new image has been uploaded, you will see the file name at the top of the screen. Highlight that file name, right click, and copy. Return to your entry editing tab.
In the "image=" field, click on the "Embeded Image" button in the toolbar at the top of the text box. The correct wiki code gets inserted, and you simply have to insert the file name of the image you just uploaded. Right Click on Example.jpg (which is highlighted already) and paste in the file name of the image you jut uploaded.
Step 3. - Fill in template fields
This step is quite simple. After each field enter the correct information. If you don't know the answer for a field, just leave it blank. It should looks something like this:
Code:
{{Hero|
image=[[Image:Sasquatch.jpg]]
|character_name=Sasquatch
|real_name=Dr.Walter Langkowski
|debut=''Uncanny X-Men'' #120
|affiliations=[[Omega Flight III|Omega Flight]]
|past_affiliations=[[Alpha Flight]], [[Beta Flight]], [[Gamma Flight I|Gamma Flight]], [[Howling Commandos]]
|status=Active
|aliases=[[Tanaraq]], [[Box III]]
|relatives=[[Langkowski Veronica|Veronica Langkwoski]] (Wife), Unnamed son
|height=6'4", (as Sasquatch) 10'0
|weight=245 lbs, (as Sasquatch) 2000lbs
|eyes=Blue, (as Sasquatch) Red
|hair=Blonde, (as Sasquatch) Orange
|}}
You will notice some items in this example are in double square brackets. This is how to insert a link in wiki-code. I'll discuss that in more detail later.
So now you are done with the template!
Step 4. - Adding Information
 Now it's time to add the meat to your page. To organize things it is always good to use Headlines. It creates different areas in the page for the sake of organization. The wiki-code to make a headline is
== Headline text == where "Headline Text" is the title of the section of information, for example == History== is the headline for the history of a character. Enter all your information using whatever headlines you like. For the sake of uniformity, it wouldn't hurt to look at how other pages are headlined.
Step 5. - Adding Links
To have a truly successful wiki, pages must all be linked together. All character names, locations, items of interest, ect. should all be linked. There are two types of links you will need to know how to add. If the text you are linking to an other page appears exactly the same as the page name, then just highlight it and click the "Internal Link" button on the toolbar...or add double square brackets to the word, both result in the word appearing like this: [[Tanaraq]]. Now the word Tanaraq will link to the pages of the same name.
If the text you want to link does not appear in your page exactly the same as the link name, do it as follows
Code:
[[Exact Page Name|Your own text]]
for example the Page name for Sasquatch is actually "Sasquatch I" If you make reference to "Sasquatch" in your entry in truth you want it to link to "Sasquatch I", it would appear as follows:
Code:
[[Sasquatch I|Sasquatch]]
Step 6. - Catagorizing Your Page
All entries must be categorized to appear in the categories that appear in the Navigation links on the left hand column. The templates do most of the categorization automatically, but it is sometime necesary to enter a page into an extra catagory. A good example of this is for Alpha Flight characters. You would use the Heroe template. That template will insert your entry automatically into the Master Index category, and into the Heroes category, but it does not insert your entry into the Alpha Flight category. To do this yourself you need to add one line of wiki code at the very bottom of your entry:
Code:
[[Category:Alpha Flight]]
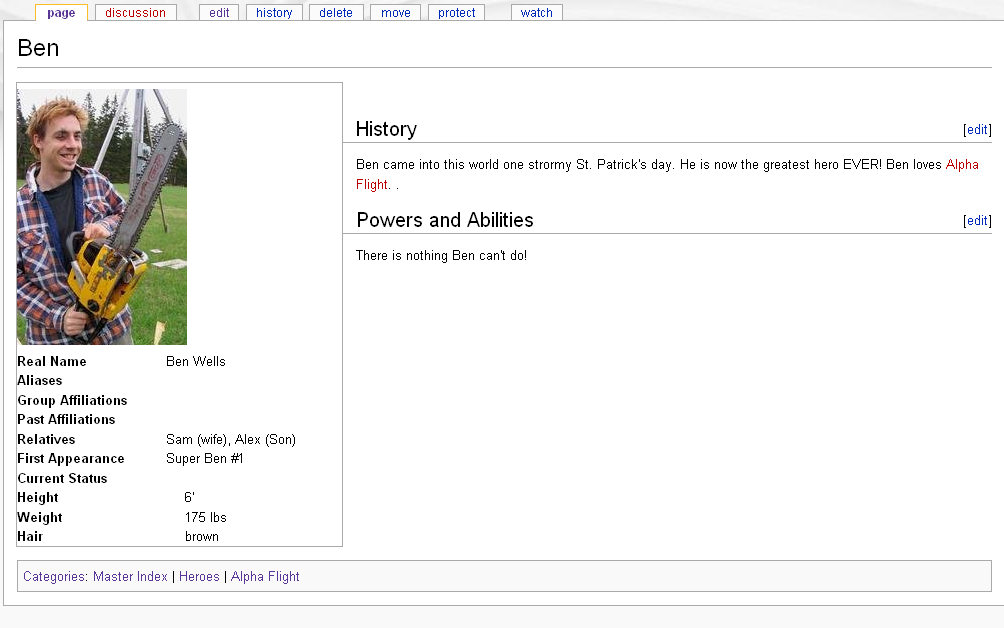 Now go ahead and save your entry. Notice how each Headline has it's own edit link to modify just that section, or you can modify the entire entry through the edit tab at the top of the page.
Please ask any questions you may have. This can seem like a lot at once, but like anything of this nature, once you've done it once, it becomes MUCH easier.


 Reply With Quote